
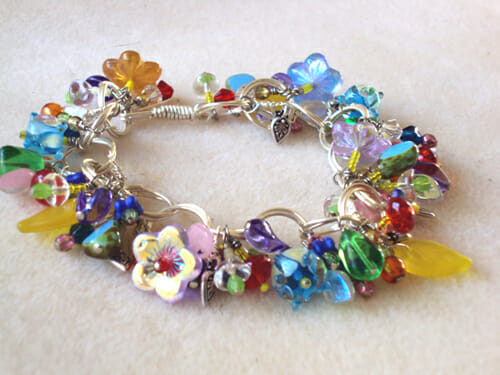
The end result is beautiful!
This is my final post in a series of ‘how to make a rainbow bracelet’.
I don’t really do rainbow myself, I prefer to select a natural palette, more organic inspired. Rainbows to me are bright, colorful things with bright yellow .. I don’t do bright yellow either. I am really working against my personal taste here but the order was for a Rainbow Bracelet, of all colors, to be a bright and splashy mixture. I use the highest quality beads, beautiful Czech glass fire-polished beads and Japanese Toho glass seed beads .. even if they are bright yellow.
Its colorful, fresh, interesting and sparkling just like a rainbow should!
Sometimes I make a few final changes if I am not delighted with the end result, not in this case .. every bead remained as planned.
- Post 1: The design stage. In my first post I showed you how I go about selecting beads for my highly ornate bracelets.
- Post 2: Preparing the beads. The second post of three, showed how I go about preparing the beads as wire charms to add to my bracelets.
- THIS POST: Making a bracelet. And this final post shows me putting the whole bracelet together.
So I hope you enjoy the slides below, please feel free to ask any questions via the COMMENTS below and LIKE onto Facebook above!
ALWAYS THE ARTIST
Dina
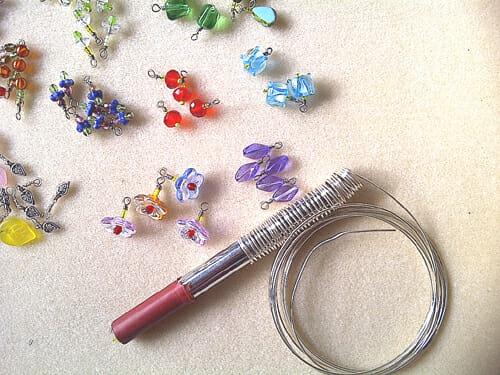
Using my ArtLinks tool, I make the wire loops for the bracelet. You can purchase the tool from my Etsy site which also comes with patterns and instructions.
Preparing the individual links.
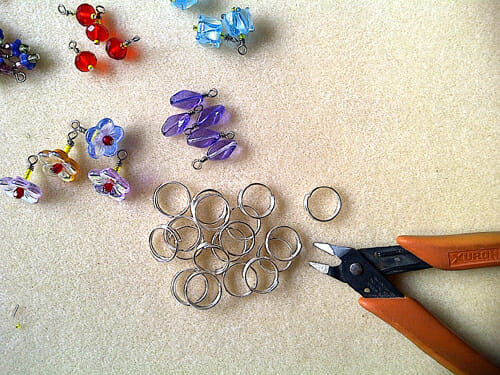
Lay out the right length of links for the bracelet. I use 17 – this fits large wrists or can be clipped tighter on small wrists.
Then I start to spread the beads out evenly, it helps organize the clutter if that makes sense.
Continuing to spread the colors out evenly, gradually filling the gaps. You can see clusters of color at the bottom of the picture. I started with the largest focal beads and slowly work my way down to the smallest and leaves. Notice how the yellow is evenly spaced, the red is evenly spaced and so on.
All the bead are laid out now, no more than 5 per link, I prefer 3 to 4. If I have more than that I would remove them at this stage as it starts to get ugly.

Making a wire wrapped hook. Detailed instructions can be found on the web and also in my ArtLink tool pattern book.
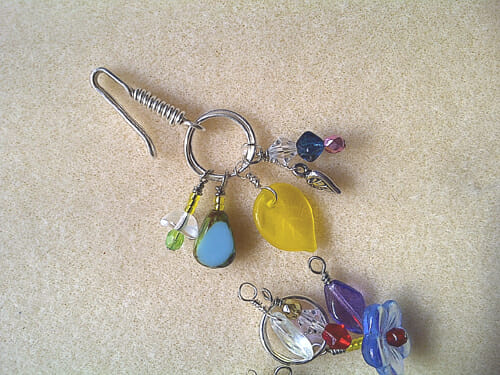
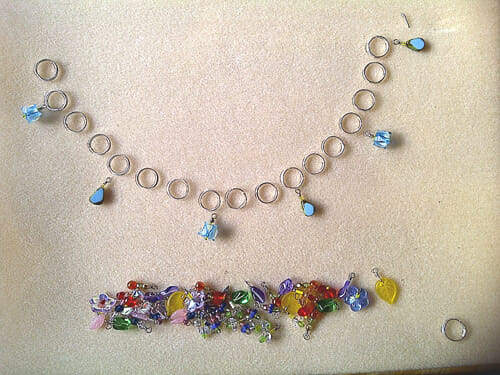
Starting the bracelet.
The first link has the wire wrap hook so I know which is the end of the bracelet. The beads are added and the loop is locked shut waiting for the next link.
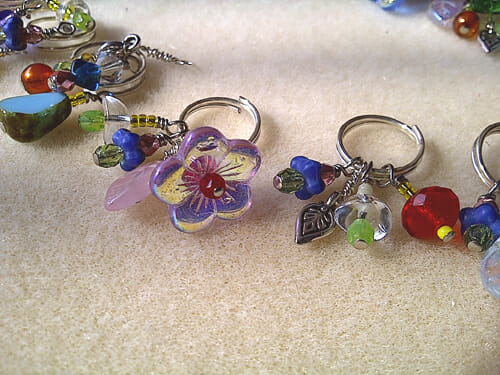
Here are the links all prepared with their beads pre-strung .. they look like beautiful little gardens just by themselves!
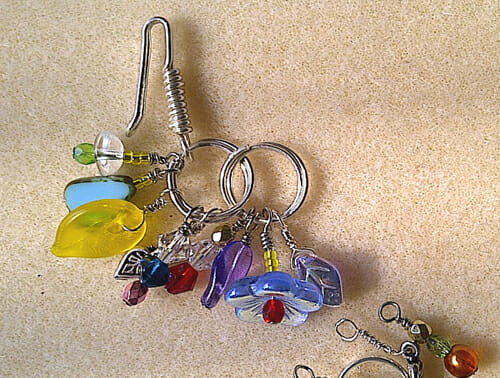
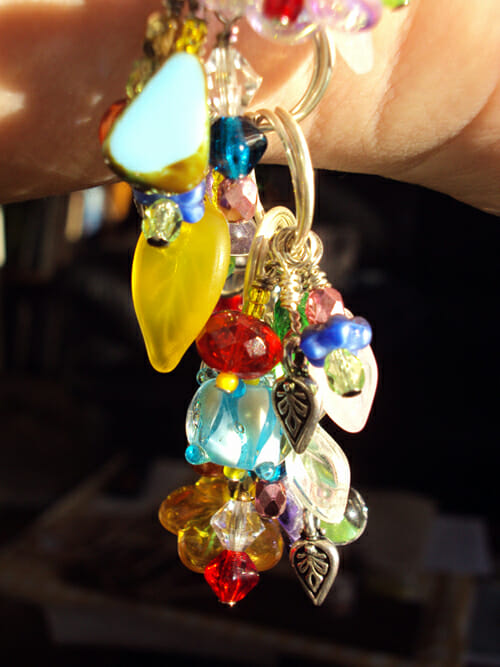
And now its simply adding one link at a time. Be careful that all the beads fall into one direction or the bracelet becomes very contorted.
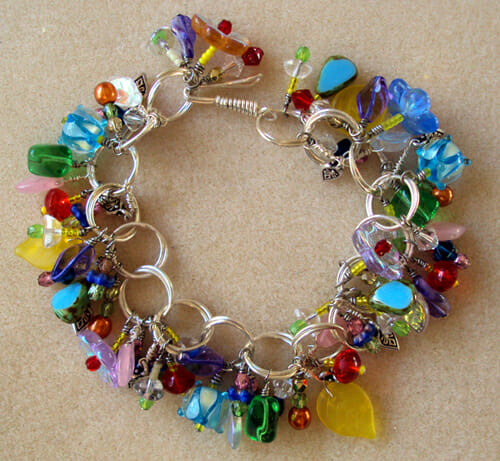
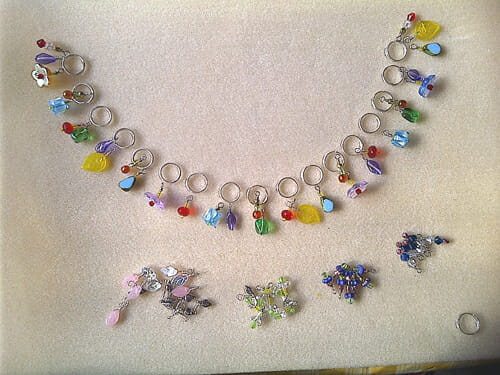
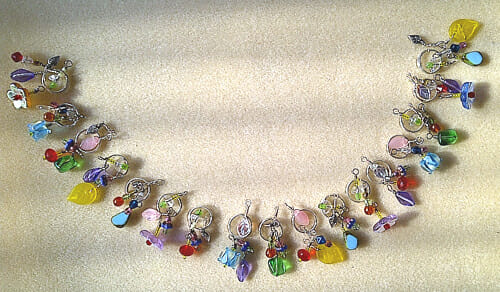
Voila! All beads, links and hook added. A rainbow of colors indeed.

An interesting collection of beads and colors.
Definitely a beautiful Rainbow Bracelet.
Don’t forget to SUBSCRIBE on the right for your weekly email notification of my latest posts.
If you LIKE this post on Facebook your friends may also enjoy reading about my projects.