I get a lot of compliments about the unique and interesting collection of beads I put together in my wire jewellery bracelets. ‘They are fun to explore’ is the common feedback.
The technique in which I prepare my beads is common to all bead crafters; however its the approach I take to select the beads is what I like to teach to others .. an artistic technique to pull the ‘story board’ together.
In the set of slides below, I show how I built up my story board over a couple of days. Like any artwork, you start, you fiddle, you step back, you walk away from it for a while, you come back and fiddle some more, you look at it upside down, get an opinion, change a bit more and so on. Its an evolutionary process. I cant walk into a bead store and pre-select like shopping for groceries, most bead artists have many beads on hand of differing shapes, tones, sparkle to choose from.
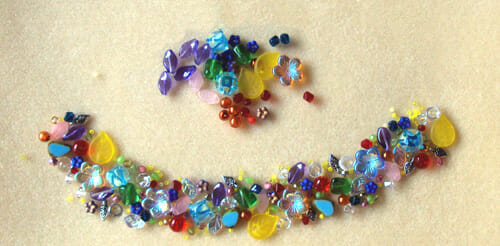
This story board is for a rainbow bracelet.
I don’t really do rainbow myself, I prefer to select a natural palette, more organic inspired. Rainbows to me are bright, colorful things with bright yellow .. I don’t do bright yellow either. I am really working against my personal taste here but the order was for a Rainbow Bracelet, of all colors, to be a bright and splashy mixture.
I still use the highest quality beads, beautiful Czech glass fire-polished beads and Japanese Toho glass seed beads .. even if they are bright yellow. And for the record: I don’t actually like the finished story board either being its so rainbowish lol.
Also please remember this is a WORK IN PROGRESS, the finished result is still 3 posts away, so be patient, stick to a vision and in the end result will be perfect!
Post 1: The design stage. These slides show how I fiddled to create the bead collection.
Post 2: Preparing the beads. On the next post I show how to prepare the beads for the wire bracelet.
Post 3: Making a bracelet. And the final post shows me putting the whole bracelet together.
So I hope you enjoy the slides below, please feel free to ask any questions via the COMMENTS below and LIKE onto Facebook above!
ALWAYS THE ARTIST
Dina
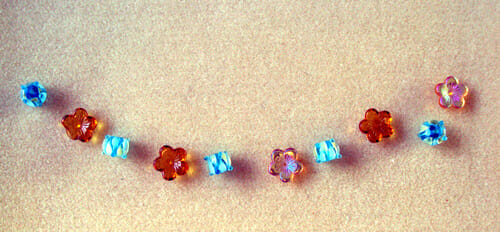
Select your feature beads and lay out into the finished size. Here I used blue lamp-work and amber flowers, note some are iridized.
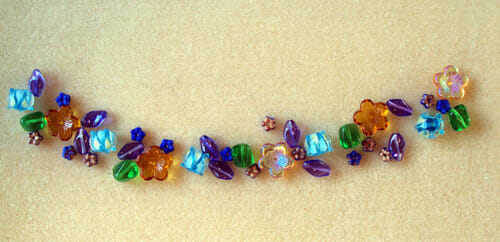
Start adding other colors. Here its green lumps, purple twists and dark blue flowers .. all very technical terms here.
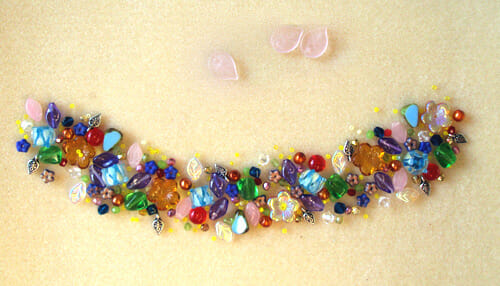
Then I started tossing in the whole rainbow .. pink leaves (2 sizes), red beads (2 sizes) and orange glass pearls.
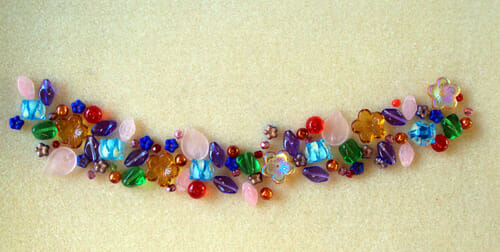
Add small beads for back-fill in softer colors than the main beads, I used various greens, pink and gold. Plus I had mirror finish for that rainbow shine (the pink and gold) and then added small silver leaves for even more bling.
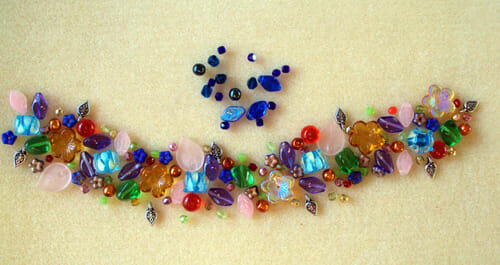
I looked at it upside down and was definitely not happy with the collection yet. Ray suggested adding more blue .. but which blue? They are very strong in color.
The dark green-blue mid-size worked, it added more punch in the depth. I have added yellow seed beads for back-fill, it looks a pretty but a mess to me so time for an overnight break.
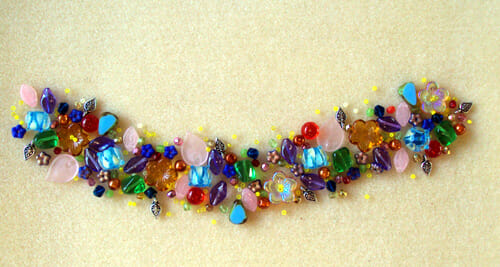
Next day .. time for some changes and where is the rainbow yellow? Plus I preferred less pink so I removed some leaves added some clear beads to ‘open’ more light into the design. Remember think: ‘rainbow, rainbow, I am a rainbow’.
Now I have added yellow leaves and changed the flowers from amber to pink.
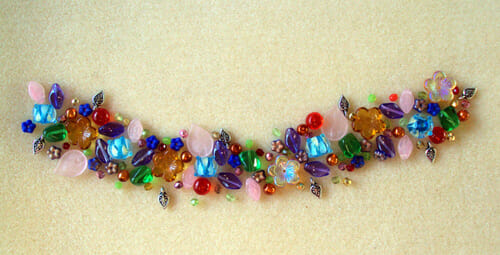
Finally its looking more like a rainbow yayy however it’s time to thin the whole cluster as I have too many beads in total.
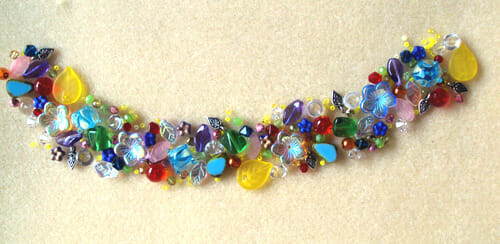
Tadaaa … and the final rainbow cluster is complete! By the time silver links are used and I jiggle at the finishing stage it should look great and very rainbowy. Remember aim for the vision at the end and not the interim appearance or your favorite colors. What suits you doesn’t suit the next person!
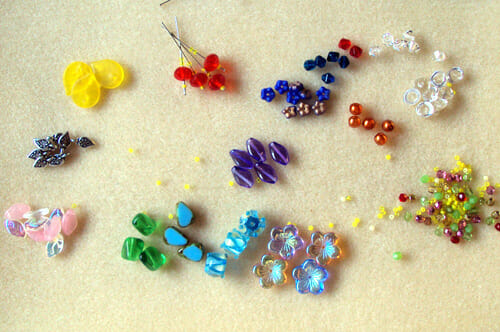
So here are the beads all ready to begin the next stage of preparation .. nearly impossible to shop for!
See you next post where I prepare the beads!