In my last post we looked at how to design your garden lights. In my yard I had come up with the following design and was now armed with a shopping list to take to the light store. I required: 5 garden lights, one pillar light for the driveway, 2 house lights for the front door (security light) and the gate, transformer, 50 m cable and a timer.
Ask the expert!
I knew nothing about the products, the brands, about lights … in my mind I leave that to experts. I simply had my drawing, photos on my iPad and my shopping list. I didn’t even bother planning what color of lights, wattage, design or budget, again I was leaving that for the expert.
So off to expert #1. I had bought lights from this store before and the service was great so I thought I would try them again. There was no point going to a self service store as I didn’t know what to get. Basically the lighting plan was easily consulted on, despite all my flashy intentions, the outcome was to keep it simple. I ended up with 5 lights the same, the obvious sensor spot light for the front door, a down light for the gate and the right configuration of transformer.

Aqualux spotlights x 5
Novice tip .. Don’t get too worried about planning the wattage of the bulbs at this stage, go for something average in all the lights because I found we changed them around a fair bit once installed.
To install garden lights, it’s either DIY intensive or get some help.
Installing garden lights is very easy to do yourself if you want to take the time to learn how. It’s fairly intensive learning for the non-handyman via Google Option B is ask a handyman friend to help. Option C is pay an electrician or a handyman. For our garden I was fortunate that Ray is a handyman and we timed the lights to be installed when the family was visiting for my birthday. So we had dad the technician, the boys to dig the cable, mum to cook nibbles and me with the plan in my hand! The perfect combination. I also required an electrician separately to install the new gate down light which was attached in an internal house switch on the 240v mains.

The lighting party
Installing was really a case of following the grand plan, following the instructions for low voltage Lighting.
- Step 1: position the lights
- Step 2: lay out the cable
- Step 3: join it all and then plug it in.
Novice tips …
- Don’t dig in the cable until you try the lights that night, you will move them around a fair bit.
- Lay plenty of extra cable in loops so you can move your lights a few meters if needed.
- Buy some different wattage bulbs, we started with 20w in each light , by the time we were done we had changed a couple to softer 10w.
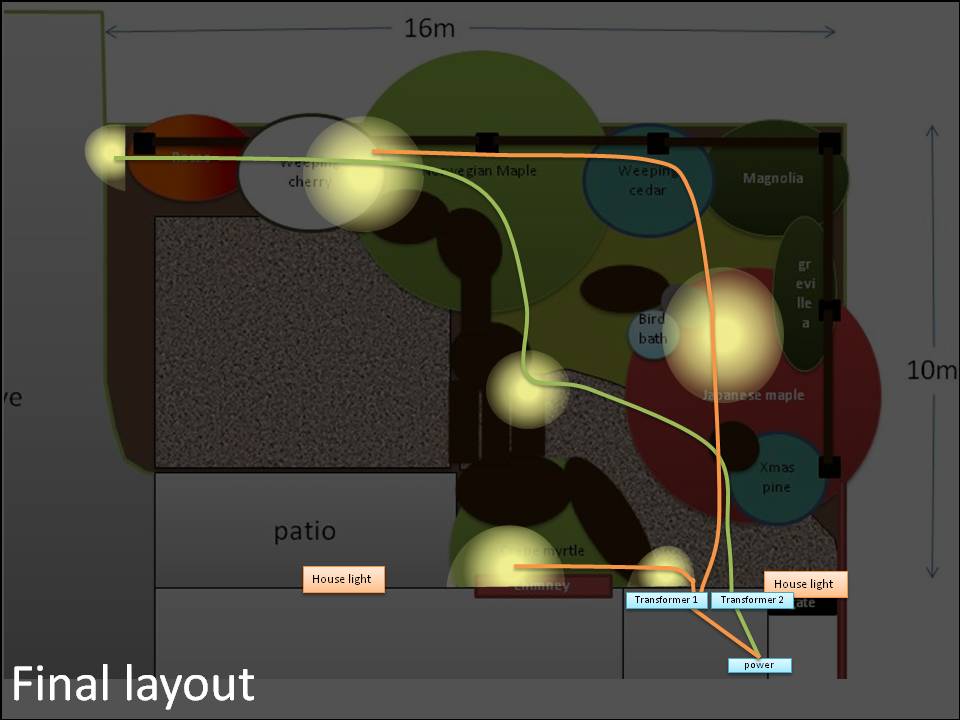
My final lighting plan .. version E.
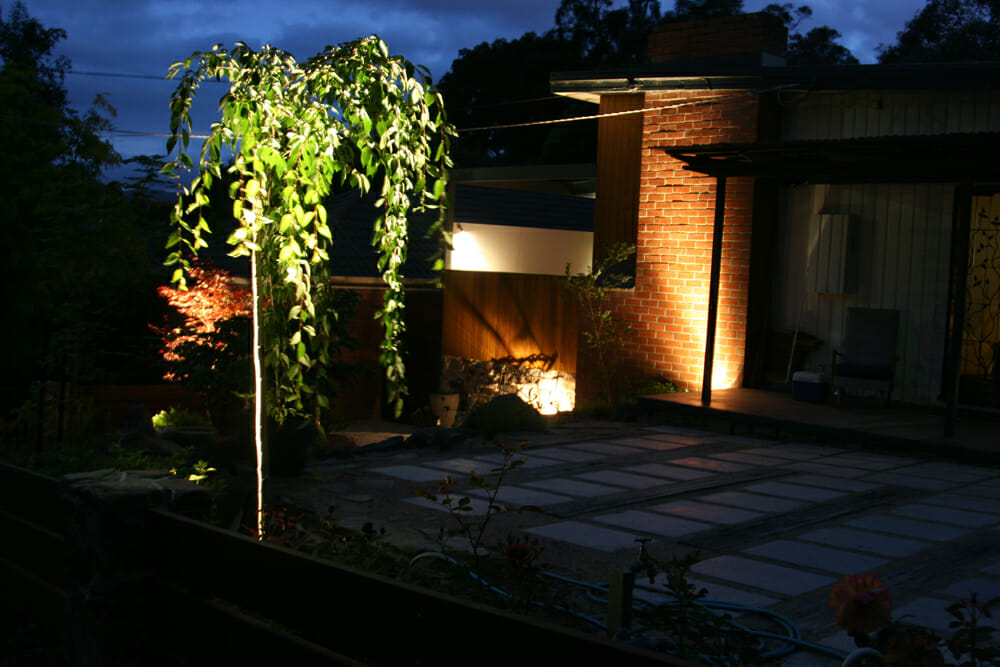
The finished effect, but it may still change.
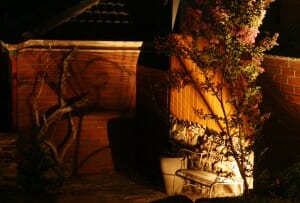
At long last after several nights of fiddling around, here are our lights!
My favourite shadow is the light under the seat. It was put there to highlight the rock wall and new timber but the added bonus was the shadow effect it cast onto the neighbours brick wall.
I do think as the trees grow and winter creates different effects I will continue to move the lights around. I wish I had MORE extra metres of cable so I can change things more-so in the future.

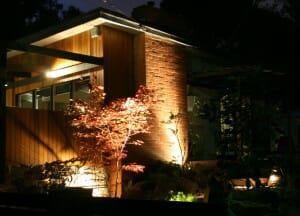
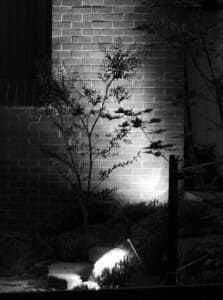
A really neat effect was this wall wash on the chimney. I saw this on one of the pictures I collected but it has the added bonus of being a silhouette light for the crepe myrtle in front.
This means the tree itself is not lit but it created a dark silhouette due to the light behind.
Other features of the lights:
- The steps have a tight spot beam, I like how this creates variety in the lighting shapes whereas all the others are wider lights.
- The maple is a direct spotlight with the light hidden behind the feature rock.
- The weeping cherry is also a dramatic upright although I am not sure how it will look during winter.
Hope you enjoyed my garden lights!
ALWAYS THE ARTIST
Dina